### Shift Fork Replacement on a Mitsubishi 6G72 Engine #### Tools Needed: 1. click here for more details on the download manual…..
- 2018+Mitsubushi Pajero V93 Chassis & 6G72 engine gearbox Live Gearbox Torque Converter Seal Replace.
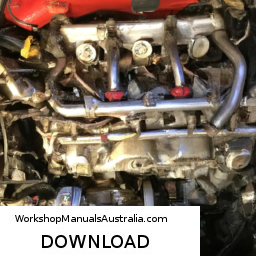
- Dodge Stealth / 3000GT 6G72 DOHC Rebuild Ep 1 – Remove Engine Links to the tools/products I highlighted are below: This 1994 Dodge Stealth R/T has the same exact engine as a Mitsubishi …
### Shift Fork Replacement on a Mitsubishi 6G72 Engine
#### Tools Needed:
1. **Socket Set** (including 10mm, 12mm, and 14mm sockets)
2. **Torque Wrench**
3. **Pliers**
4. **Screwdrivers** (flathead and Phillips)
5. **Transmission Jack** or suitable support
6. **Seal Puller** (if necessary for input/output seals)
7. **Work Light**
8. **Shop Manual** (for torque specs and diagrams)
9. **Parts Cleaner**
10. **Shop Towels**
11. **Replacement Shift Fork**
12. **Gasket Set** (if applicable)
13. **Transmission Fluid**
#### Safety Precautions:
1. **Disconnect Battery**: Always disconnect the negative terminal to prevent electrical issues.
2. **Lift Vehicle Safely**: Use jack stands to ensure the vehicle is secure when lifted.
3. **Wear Safety Gear**: Use gloves and safety glasses to protect against debris and sharp parts.
4. **Proper Ventilation**: Work in a well-ventilated area to avoid inhaling fumes from fluids.
#### Step-by-Step Procedure:
1. **Preparation**:
– Ensure the vehicle is on a flat surface and securely lifted.
– Disconnect the battery and drain the transmission fluid.
2. **Remove Transmission**:
– Remove the transmission mounting bolts using the socket set.
– Disconnect the speedometer cable, electrical connectors, and any linkage connected to the transmission.
– Support the transmission with a transmission jack and carefully remove it from the engine.
3. **Access Shift Fork**:
– Once the transmission is removed, place it on a clean workbench.
– Remove the outer transmission case bolts and separate the case halves to access the internal components.
– Take note of the arrangement of parts for reassembly.
4. **Remove Old Shift Fork**:
– Locate the shift fork within the transmission. It is usually connected to the shifter rod.
– Disconnect any retaining clips or bolts holding the shift fork in place using pliers or a socket.
– Carefully slide the old shift fork off the shifter rod.
5. **Install New Shift Fork**:
– Clean the area where the shift fork sits with parts cleaner.
– Slide the new shift fork onto the shifter rod, ensuring it is seated properly.
– Reinstall any clips or bolts that secure the shift fork in place, tightening to the specified torque in the shop manual.
6. **Reassemble Transmission**:
– Clean the mating surfaces of the transmission case halves. Replace the gasket if necessary.
– Carefully align and reassemble the case halves, ensuring that all components are correctly positioned.
– Reinstall the transmission case bolts and tighten them to the specified torque.
7. **Reinstall Transmission**:
– Position the transmission back onto the engine using the transmission jack.
– Reconnect all electrical connectors, speedometer cable, and linkage.
– Tighten the transmission mounting bolts to the specified torque.
8. **Refill Transmission Fluid**:
– Replace the drain plug and refill the transmission with the correct type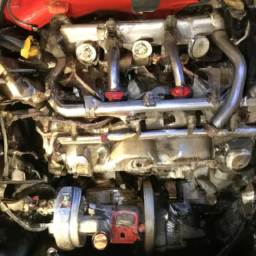 and amount of fluid.
9. **Reconnect Battery**:
– Reconnect the negative terminal of the battery.
10. **Test Drive**:
– Start the vehicle and check for any leaks.
– Perform a test drive to ensure proper operation of the transmission and shift fork.
#### Common Pitfalls to Avoid:
– **Not Cleaning Components**: Failing to clean the mating surfaces can lead to leaks.
– **Incorrect Torque Settings**: Always refer to the shop manual for the correct torque specifications to avoid damaging components.
– **Forgetting to Reconnect Components**: Double-check all connectors and linkages before reassembly.
– **Using Wrong Fluid Type**: Ensure you use the manufacturer’s recommended transmission fluid.
#### Replacement Parts:
– **Shift Fork**: Always replace with OEM or high-quality aftermarket parts.
– **Gaskets and Seals**: Replace any gaskets and seals to prevent leaks upon reassembly.
By following these steps carefully, you can successfully replace the shift fork on a Mitsubishi 6G72 engine.
The starter relay is a crucial component in an automotive electrical system, responsible for facilitating the starting process of an internal combustion engine. As a solenoid switch, it acts as an intermediary between the ignition switch and the starter motor, ensuring that enough current flows to the starter while protecting the ignition circuit from high current loads.
When the driver turns the ignition key to the “start” position, a small voltage is sent to the starter relay from the ignition switch. This low-voltage signal activates the relay’s coil, generating a magnetic field that pulls in a movable armature. This armature closes the relay contacts, allowing a much larger current from the battery to flow to the starter motor. The relay essentially acts as a high-current switch that can be controlled by a low-current signal, which is a principle rooted in electromagnetic induction.
The starter relay interfaces primarily with the battery, ignition switch, and starter motor. The battery provides the necessary high voltage and current to crank the engine. The ignition switch, when turned, energizes the relay, which in turn allows current to flow from the battery to the starter motor. The physics of this operation involves principles of electromagnetism, where an electric current passing through a coil creates a magnetic field, a concept described by Ampère’s Law.
Moreover, the starter relay often has built-in features such as a diode to prevent voltage spikes that can occur when the relay is deactivated, protecting the vehicle’s electronic systems. This component is typically mounted in a relay box within the engine compartment or near the battery, ensuring it is both accessible and protected from environmental damage. In summary, the starter relay is an essential part of the starting system, embodying fundamental electrical engineering principles to enable the reliable operation of modern vehicles.
STEEL – BUILD TECHNOLOGY Steel Build Technology, team of skilled professionals offers metals stud framing services in Toronto and the GTA.
installation guide steel framing – Archiclad general inforMaTion rondo Steel Stud drywall Framing Systems provide designers with a versatile and durable framing system, manufactured to australian and new Zealand Standards.
Superior Wall Systems (SWS) For over 45 years, SWS has been a leader in steel stud framing, drywall installation, lath & plaster, and prefabricated building components.
Metal Stud Framing | Custom Homes, Townhomes, Subdivisions. Konstruction Group Inc. is a trusted metal stud framing contractor in Toronto. Our services include drywall installation. Give us a call for a free estimate.
Metal Stud Framing | Houston, TX Looking for professional metal stud framing? Contact Acoustic Ceiling Kings LLC and ask us for a free quote.
How to Install Metal Stud Framing / Drywall – YouTube We build a metal stud wall using a steel frame, plasterboard and insulation. This wall system is a brilliant way to construct an internal wall. It is light and can be constructed over a wooden …
Top Steel Stud Framing Contractors in Vancouver Steel framing contractors use materials that protect buildings from moisture, rot, fire, and termites. Steel contractors reduce waste, lower maintenance, and improve overall structural performance. Vancouver Steel Stud Framing Ltd deliver reliable framing services across Greater Vancouver.