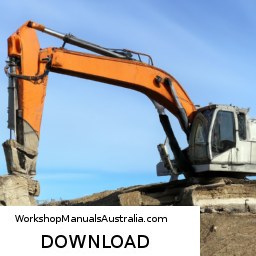
### Brake Fluid Flush on a Holland E485B Crawler Excavator #### Theory Behind Brake Fluid Flush **Purpose of Brake Fluid:** Brake fluid is a hydraulic fluid that transfers force from the brake pedal to the brake components. click here for more details on the download manual…..
- NEW HOLLAND KOBELCO E485 Tracked Excavator https://www.surplex.com/ You are looking for a used machine? Then you might be interested in this used machinery offer: NEW …
### Brake Fluid Flush on a Holland E485B Crawler Excavator
#### Theory Behind Brake Fluid Flush
**Purpose of Brake Fluid:**
Brake fluid is a hydraulic fluid that transfers force from the brake pedal to the brake components. It must remain clean and free of moisture to ensure optimal braking performance. Over time, brake fluid can absorb moisture, which can lead to corrosion and decreased braking efficiency.
**Why Flush the Fluid:**
Flushing the brake fluid removes contaminants and moisture, ensuring the brake system operates effectively. Think of brake fluid like the oil in your car’s engine: just as old oil can lead to engine wear, old brake fluid can lead to brake failure.
### Components of the Brake System
1. **Master Cylinder:** This is the component connected to the brake pedal that generates hydraulic pressure when the pedal is pressed.
2. **Brake Lines:** These are tubes that carry the brake fluid from the master cylinder to the brake calipers or cylinders at each wheel.
3. **Brake Calipers/Cylinders:** These components apply pressure to the brake pads/shoes against the rotors/drums to stop the excavator.
4. **Brake Fluid Reservoir:** This is where the brake fluid is stored and provides a supply to the master cylinder.
### Tools and Materials Needed
– Fresh brake fluid (check your excavator manual for the recommended type)
– Brake fluid flush kit (may include a vacuum pump)
– Wrenches/socket set
– Brake line bleeder wrench
– Rags or paper towels
– Safety goggles and gloves
### Step-by-Step Brake Fluid Flush Procedure
1. **Preparation:**
– Park the excavator on a flat surface and turn off the engine.
– Put on safety goggles and gloves.
2. **Locate the Brake Fluid Reservoir:**
– Find the brake fluid reservoir, usually near the master cylinder. Remove the cap and check the fluid level and condition (it should be clear).
3. **Remove Old Fluid:**
– Using a turkey baster or suction tool, remove as much old fluid from the reservoir as possible. Dispose of the old fluid properly.
4. **Fill with Fresh Fluid:**
– Refill the reservoir with fresh brake fluid to the recommended level.
5. **Bleeding the Brakes:**
– Start with the wheel farthest from the master cylinder (usually the rear passenger side).
– Locate the bleeder valve on the brake caliper.
– Attach a clear tube to the bleeder valve, placing the other end in a container to catch old fluid.
– Have an assistant press the brake pedal slowly and hold it down.
– Open the bleeder valve slightly using a wrench. Old fluid and air will escape through the tube. Close the valve before your assistant releases the brake pedal. Repeat this process until you see clear fluid without bubbles in the tube.
– Check the fluid level in the reservoir frequently, adding fresh fluid as necessary to prevent it from running dry.
– Move to the next wheel, following the order (rear passenger, rear driver, front passenger, front driver).
6. **Final Steps:**
– Once all wheels have been bled, double-check the fluid level in the reservoir and top it off if needed.
– Replace and tighten the reservoir cap.
– Test the brake pedal for proper feel. It should feel firm, not spongy.
7. **Dispose of Old Fluid:**
– Properly dispose of the old brake fluid according to local regulations.
### Common Issues
– **Moisture Contamination:** If moisture is present in the brake fluid, it can lead to corrosion in brake components and reduced braking efficiency.
– **Air in the System:** If air gets into the brake lines, it can cause a spongy brake pedal and ineffective braking.
– **Old or Contaminated Fluid:** Dark, dirty fluid indicates contamination, which can lead to brake failure.
### Summary
A brake fluid flush is essential for maintaining the safety and efficiency of your Holland E485B Crawler Excavator’s braking system. By keeping the fluid clean and free of moisture, you ensure reliable performance and extend the life of your brake components. Always follow safety precautions and dispose of fluids responsibly.
An expansion tank, also known as a coolant reservoir or overflow tank, is a crucial component in a vehicle’s cooling system. Its primary function is to manage the coolant fluid that circulates through the engine to regulate temperature and prevent overheating. The expansion tank serves as a buffer for excess coolant that expands due to heat, ensuring that the pressure within the cooling system remains within optimal limits.
When the engine operates, the coolant absorbs heat and expands. This expansion increases the pressure in the cooling system. The expansion tank accommodates this excess coolant, preventing it from leaking out of the system. As the engine cools down, the coolant contracts, creating a vacuum that draws fluid back into the cooling system from the expansion tank, ensuring a consistent level of coolant.
The expansion tank interfaces with several other components, including the radiator, water pump, thermostat, and hoses. The radiator dissipates heat from the coolant, while the water pump circulates the coolant through the engine and back to the radiator. The thermostat regulates the coolant flow based on temperature, opening and closing as needed.
The operating physics behind the expansion tank involves principles of thermodynamics, particularly the behavior of liquids under varying temperatures and pressures. The tank is typically made of durable, heat-resistant materials to withstand the harsh conditions of the engine environment. Furthermore, it is designed to have a pressure relief valve that ensures the system does not exceed safe pressure levels, preventing potential damage to the engine or cooling components. In summary, the expansion tank plays an integral role in maintaining the efficiency and longevity of the vehicle’s engine by managing coolant levels and pressures effectively.
Luis Quintanilla Verges – — | LinkedIn Mira el perfil de Luis Quintanilla Verges en LinkedIn, una red profesional de más de 1.000 millones de miembros.
Lus Quintanilla Sr – — | LinkedIn — · Experience: Catholic Hospice · Location: Greater Orlando. View Lus Quintanilla Sr’s profile on LinkedIn, a professional community of 1 billion members.
800+ "Luis Quintanilla" profiles | LinkedIn View the profiles of professionals named “Luis Quintanilla” on LinkedIn. There are 800+ professionals named “Luis Quintanilla”, who use LinkedIn to exchange information, ideas, and…
Luis Quintanilla – Guest Arrivals yacht Capt. | LinkedIn I can help automate your shows using current midi tech and software such as Ableton and Logic. Can also tech Recording techniques and performance techniques.
ML Transportation – LinkedIn ML Transportation | 19 followers on LinkedIn. We take the complexity out of shipping via truck in PA, Ohio, New York, New Jersey, Virginia, Maryland and Delaware.
ML TRANSPORT SERVICES LLC in Kyle, TX | Company Info & Reviews – Bizapedia Discover Company Info on ML TRANSPORT SERVICES LLC in Kyle, TX, such as Contacts, Addresses, Reviews, and Registered Agent.
800+ "Luis Quintanilla" profiles | LinkedIn View the profiles of professionals named "Luis Quintanilla" on LinkedIn.
2 "Ml Transport" profiles | LinkedIn View the profiles of professionals named “Ml Transport” on LinkedIn. There are 2 professionals named “Ml Transport”, who use LinkedIn to exchange information, ideas, and opportunities.
100+ "Luis Quintanilla" profiles | LinkedIn View the profiles of professionals named "Luis Quintanilla" on LinkedIn.
BrokerSnapshot – ML TRANSPORT SERVICES LLC USDOT3964376, – ML TRANSPORT SERVICES LLC. Address: 207 LILAC WAY. City KYLE, TX. Phone: (737) 248-5191