
Balancing the wheels on a VOLVO EC220E NH Excavator is essential for ensuring even wear, improved handling, and overall machine performance. click here for more details on the download manual…..
- Video walkaround EC220E crawler excavator digger, English subtitles Volvo EC220E digger: First choice for comfort. The EC220E digger from Volvo builds on its reputation for efficiency by ensuring all …
- Volvo EC220E NH tracked excavator
Here’s a step-by-step guide to wheel balancing:
– **Preparation**
– Ensure you have the necessary tools and materials:
– **Wheel Balancer**: A specialized machine designed to detect and correct imbalances in wheels.
– **Jack and Jack Stands**: Used to lift the excavator safely.
– **Torque Wrench**: For properly tightening wheel bolts to manufacturer specifications.
– **Weights**: These are used to correct any imbalances found during the balancing process.
– **Cleaning Supplies**: Such as a wire brush and degreaser to clean the wheel surfaces.
– **Safety First**
– **Park on a Level Surface**: Ensure the excavator is parked on a flat, stable surface to prevent any movement during the balancing process.
– **Engage the Parking Brake**: Always engage the parking brake to secure the machine.
– **Wear Personal Protective Equipment (PPE)**: This includes gloves, safety goggles, and steel-toed boots.
– **Lift the Excavator**
– **Position the Jack**: Place the jack under the designated lifting points of the excavator.
– **Secure with Jack Stands**: After lifting, place jack stands under the excavator to ensure it remains stable and secure while working on the wheels.
– **Remove the Wheels**
– **Loosen Wheel Bolts**: Use the appropriate socket and ratchet to slightly loosen the wheel bolts before fully removing the wheel.
– **Remove the Wheel**: Carefully take off the wheel and set it aside on a clean surface.
– **Inspect the Wheel and Tire**
– **Check for Damage**: Look for any cracks, bends, or damage to both the tire and wheel rim.
– **Clean the Wheel**: Use a wire brush and degreaser to clean the mounting surface of the wheel and the hub to ensure proper contact.
– **Mount the Wheel on the Balancer**
– **Follow the Balancer Instructions**: Place the wheel on the wheel balancer according to the manufacturer’s instructions, ensuring it is properly secured.
– **Calibrate the Balancer**: Ensure the balancer is calibrated and ready to perform the balancing operation.
– **Balance the Wheel**
– **Run the Balancer**: Activate the wheel balancer to spin the wheel. The machine will measure any imbalances.
– **Analyze Results**: The balancer will indicate where weights need to be placed to correct any imbalance.
– **Add Weights**
– **Select Appropriate Weights**: Based on the balancer’s reading, choose the correct weights to add to the wheel.
– **Attach Weights**: Secure the weights to the wheel in the specified locations, usually on the inner and outer sides of the rim.
– **Recheck Balance**
– **Spin Again**: Place the wheel back on the balancer and spin it again to ensure that it is now balanced correctly.
– **Confirm Imbalance is Corrected**: The balancer should show that the wheel is now within acceptable limits.
– **Reinstall the Wheel**
– **Position the Wheel**: Carefully lift the balanced wheel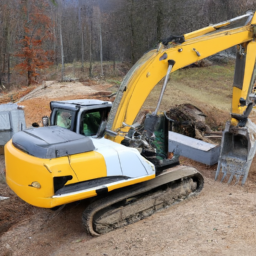 and align it with the hub of the excavator.
– **Hand Tighten Bolts**: start by hand-tightening the wheel bolts to ensure they are in the correct position before using a wrench.
– **Torque the Bolts**
– **Use the Torque Wrench**: Refer to the manufacturer’s specifications for the correct torque settings and use the torque wrench to tighten the bolts in a star pattern to ensure even pressure.
– **Repeat for Other Wheels**
– **Follow Steps for Each Wheel**: Repeat the process for any additional wheels that require balancing.
– **Lower the Excavator**
– **Remove Jack Stands**: Carefully remove the jack stands that were securing the excavator.
– **Lower the Jack**: Slowly lower the excavator back onto the ground.
– **Final Check**
– **Inspect All Wheels**: Ensure all wheels are properly installed and torqued to specifications.
– **Test Run**: Conduct a brief test run to check for vibrations or abnormal handling, indicating whether further adjustments are needed.
Following these steps will help ensure that the wheels of your VOLVO EC220E NH Excavator are balanced, leading to improved performance and longevity of both the wheels and tires.
A gear oil pump is a critical component in various machinery and vehicles that require the circulation of gear oil to ensure optimal performance and longevity of the gear systems. This type of pump is specifically designed to move viscous fluids, such as gear oil, which typically has a higher viscosity than standard lubricants. The primary function of the gear oil pump is to provide a continuous flow of lubricating oil to the gears, bearings, and other moving parts within a gearbox or differential.
Most gear oil pumps operate on the principles of positive displacement, utilizing gears to create a vacuum that draws in the oil and forces it out under pressure. There are two main types of gear pumps: external and internal. External gear pumps consist of two gears, one driven and one driven, that mesh together to transport the oil. Internal gear pumps, on the other hand, use an inner gear that rotates within an outer gear, creating a sealed cavity that moves the oil.
The effective circulation of gear oil is crucial, as it helps to reduce friction and wear between components, dissipate heat generated during operation, and prevent the formation of harmful deposits. Additionally, a well-functioning gear oil pump can improve overall efficiency and performance, extending the lifespan of the machinery or vehicle. Regular maintenance and inspection of the gear oil pump are essential to prevent failures that could lead to significant damage or costly repairs.
A seatbelt buckle is a crucial safety component in vehicles designed to secure occupants in their seats during a collision or sudden stop. Typically made of durable materials such as metal and high-strength plastics, the buckle consists of a latch mechanism that engages and releases the seatbelt strap. It features a button or lever that allows for easy release when needed. The buckle is engineered to withstand significant forces, ensuring that it remains intact during an accident. Additionally, it often includes a visual or tactile indicator to confirm that the seatbelt is properly fastened. Overall, the seatbelt buckle plays a vital role in enhancing passenger safety by minimizing the risk of injury during unexpected events on the road. Its design prioritizes both functionality and user convenience, reflecting its importance in modern automotive safety systems.
The suspension crossmember repair on a Volvo EC220E NH excavator involves addressing issues related to the crossmember that supports the suspension system of the machine. The crossmember is a crucial structural component that provides stability and support to the excavator’s undercarriage, ensuring proper alignment and functionality of the suspension system.
**Key Points about the Repair:**
1. **Purpose of the Crossmember**: The crossmember helps distribute loads and absorb shocks from the ground, contributing to the overall stability and performance of the excavator during operation.
2. **Common Issues**: Over time, the crossmember can suffer from wear and tear, cracking, or damage due to heavy use, impact, or corrosion. These issues can lead to compromised stability and potentially affect the excavator’s performance.
3. **Repair Process**:
– **Inspection**: The first step involves a thorough inspection of the crossmember to assess the extent of damage.
– **Removal**: If repairable, the crossmember may need to be removed from the excavator for more detailed work.
– **Welding or Reinforcement**: Depending on the damage, techniques like welding or adding reinforcement plates may be employed to restore structural integrity.
– **Replacement**: If the damage is too severe, replacing the crossmember with a new or refurbished part may be necessary.
– **Reinstallation**: Once repaired or replaced, the crossmember is reinstalled, ensuring proper alignment and secure attachment.
4. **Maintenance**: Regular maintenance and inspections can help identify issues early, preventing the need for extensive repairs and prolonging the lifespan of the excavator.
5. **Safety Considerations**: Proper safety measures must be followed during the repair process to ensure the safety of technicians and the operational integrity of the excavator.
Overall, suspension crossmember repair is essential for maintaining the performance, safety, and longevity of a Volvo EC220E NH excavator, ensuring it operates efficiently in various working conditions.
An oil cooler is a crucial component in an automotive engine’s lubrication system, designed to maintain optimal oil temperature for efficient performance and longevity of the engine. As the engine operates, the oil circulates to reduce friction, lubricate moving parts, and help dissipate heat generated during combustion. However, excessive heat can degrade the oil’s properties, leading to increased wear and potential engine damage.
The oil cooler functions similarly to a radiator, using airflow to dissipate heat from the engine oil. It typically consists of a series of tubes and fins that allow the oil to flow through while air passes over the surface, cooling the oil before it returns to the engine. This component is particularly beneficial in high-performance vehicles or those that undergo heavy towing or racing, where engine temperatures can rise significantly. By ensuring that the oil remains within an ideal temperature range, the oil cooler enhances engine efficiency, reduces the risk of overheating, and prolongs the lifespan of the engine and its components.
Reconditioning the gearbox of a Volvo EC220E NH excavator involves several critical steps to ensure optimal performance and longevity. First, safety measures must be implemented, including disconnecting the battery and using proper personal protective equipment.
Begin by removing the gearbox from the excavator, following the manufacturer’s service manual for specific disassembly procedures. Carefully inspect all components for wear, including gears, bearings, and seals. Cleaning all parts thoroughly is crucial to remove contaminants and debris.
Replace worn or damaged components with OEM parts to ensure compatibility and reliability. Reassemble the gearbox, ensuring proper torque specifications are followed to avoid future failures. It’s essential to check and replace the gearbox oil, as clean lubrication is vital for smooth operation.
After reconditioning, conduct a thorough testing process before reinstalling the gearbox. Monitor for any unusual noises or leaks. Finally, document all maintenance performed for future reference. Consistent servicing and adhering to manufacturer guidelines will help maintain the excavator’s performance and extend its lifespan.
Replacing the muffler on a Volvo EC220E NH excavator involves several key steps. First, ensure the engine is off and cool to prevent burns. Disconnect the battery for safety. Locate the muffler, typically positioned near the engine. Remove any bolts or clamps securing the old muffler, and carefully detach it from the exhaust pipe. Clean the mounting surfaces to ensure a proper seal. Install the new muffler, securing it with the appropriate bolts or clamps. Reconnect the battery and check for leaks by starting the engine. Always refer to the manufacturer’s service manual for specific instructions and torque specifications. Proper maintenance ensures optimal performance and compliance with noise regulations.